Merging via Marketing Email
Automating LINE Friend Addition and Contact Merging with Marketing Emails
Last Update: June 17, 2024
You can use HubSpot's marketing email feature to simultaneously send a friend request and a merge process.
Below is a step-by-step guide to setting this up.
1. Generate Custom QR Code
To begin, create a custom QR code.
By creating a custom QR code, you can create the URL needed for the merge process.
See below for an overview of Custom QR Codes and how to initially set them up.
2. Create Marketing Emails
Create a marketing email in HubSpot that sends a custom QR code.
Insert the "Add a LINE Friend" button into the email as shown below. If you are using a button with a specific design, use the Image Module. Otherwise, use the Button Module.

CTA cannot be used in this process.
The dynamic parameters described below are not supported by the HubSpot specification for the use of CTAs.
Once the button is inserted, create the URL for the custom QR code needed for the merge process.
Access the LITTLE HELP CONNECT administration screen, open the QR code settings screen for the QR code to be used this time, and copy the "URL" value.
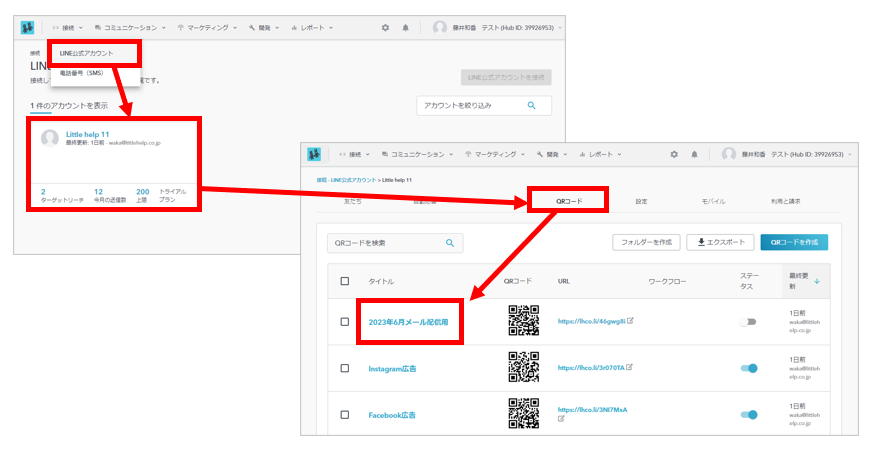
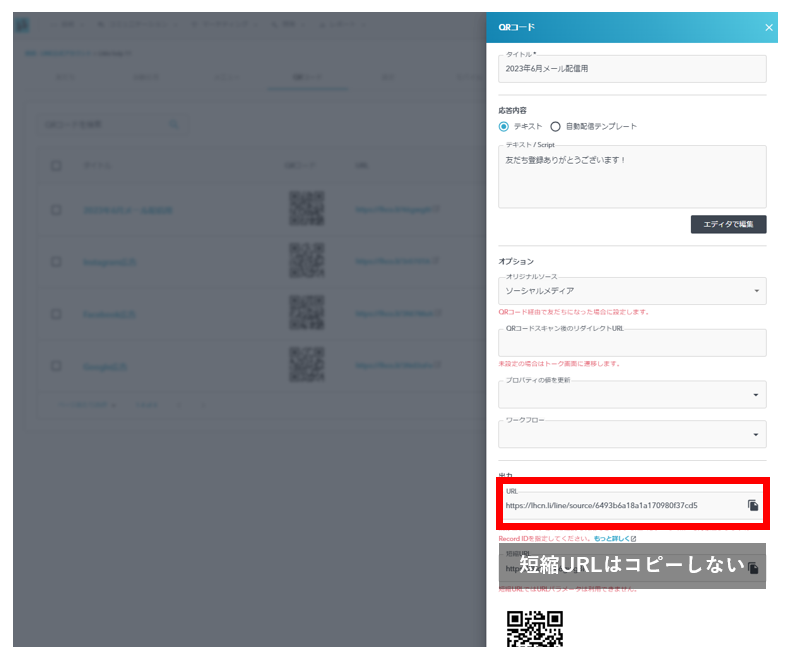
Once you have copied the URL, go back to HubSpot's Marketing Email Creator screen and set it as the URL to which the button will jump. Be sure to include "?m={{contact.hs_object_id}}" at the end of the URL.
The URL to be set for the button is as follows
[ QR code URL]?m={{contact.hs_object_id}}
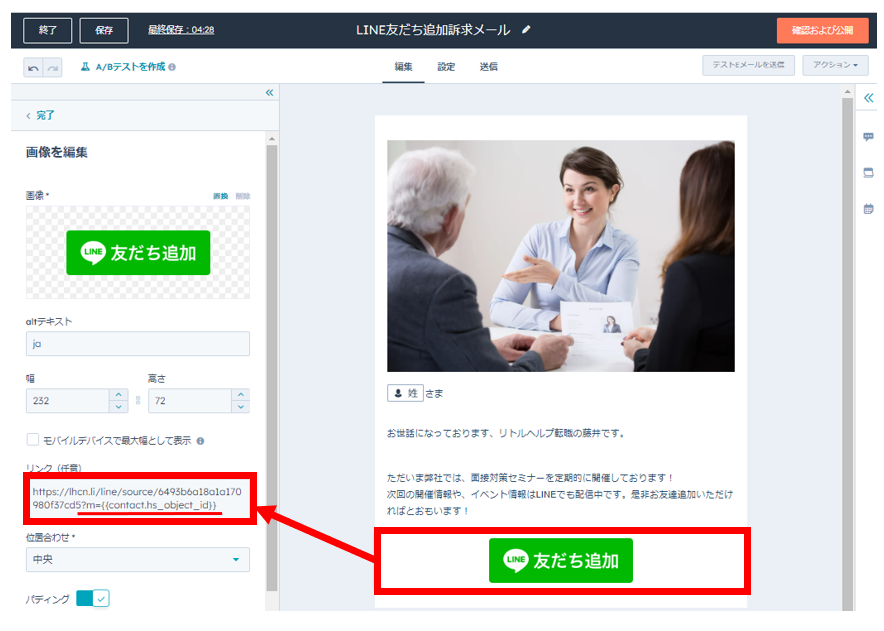
The "?m={{contact.hs_object_id}}" is a dynamic parameter. By adding this parameter, the LINE User ID will be merged with the existing HubSpot contact when the contact steps on the URL in the email.
If the parameter is not given, the merging process will not take place. Please be aware of this.
With a shortened URL for a QR Code, the parameter assignment will not work and the merging process will not be possible. Be sure to use a regular URL for the QR Code, not a shortened URL.
Reference: Cautions for sending test e-mails
When sending a test e-mail, be sure to use the "Receive email as specific contact" feature.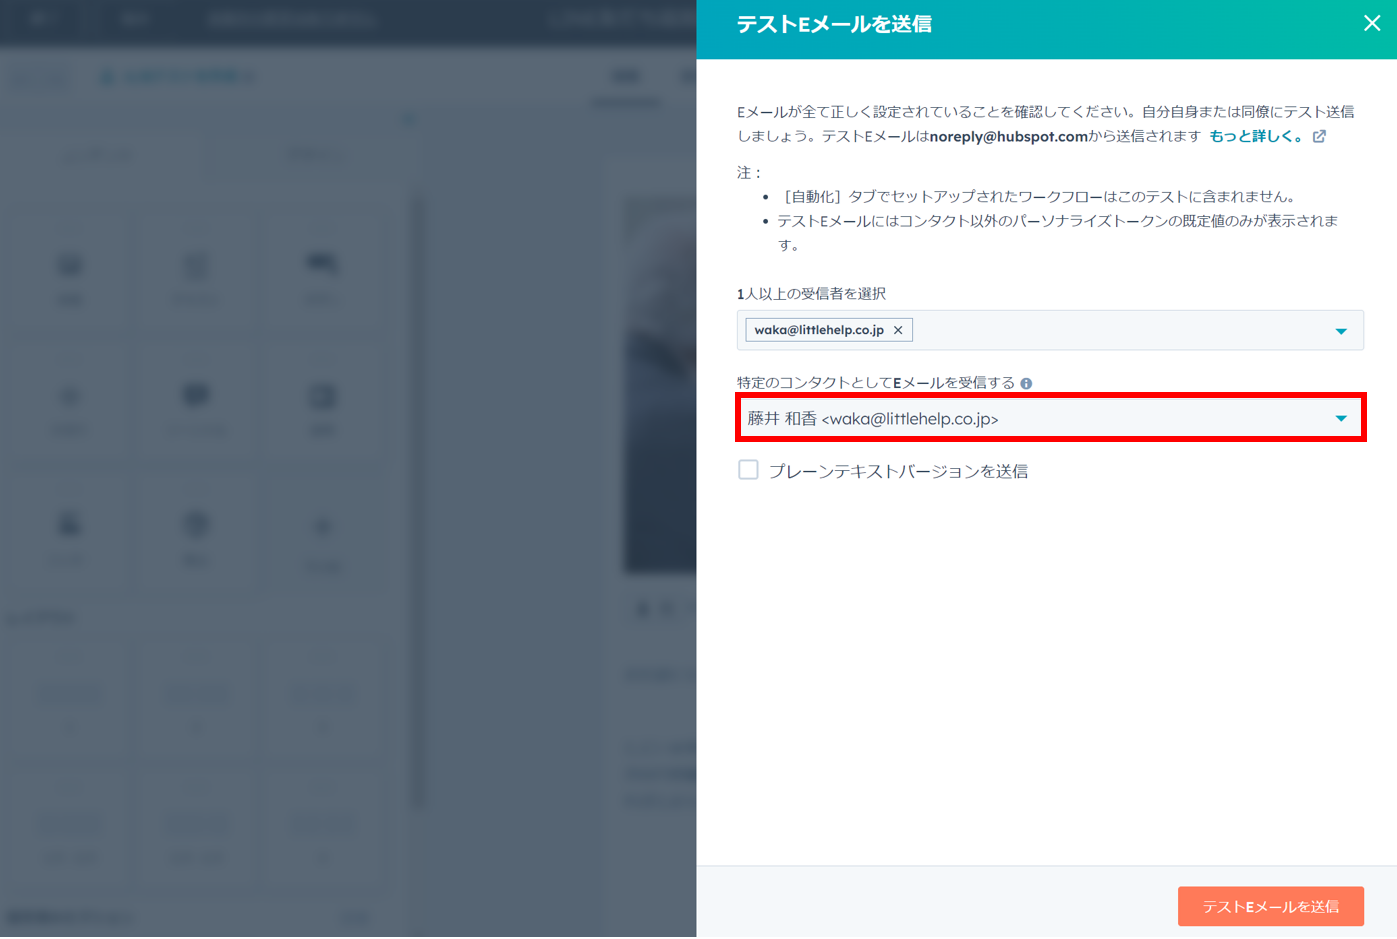
If this function is not used, the contact ID will not be transferred to the destination URL, and the operation of the merge process cannot be confirmed.
Reference: Timing of merge
When the contact receives this e-mail, the screen will transition as follows.
The contact will tap the following three buttons.
Add Friend > Allow > Add Friend
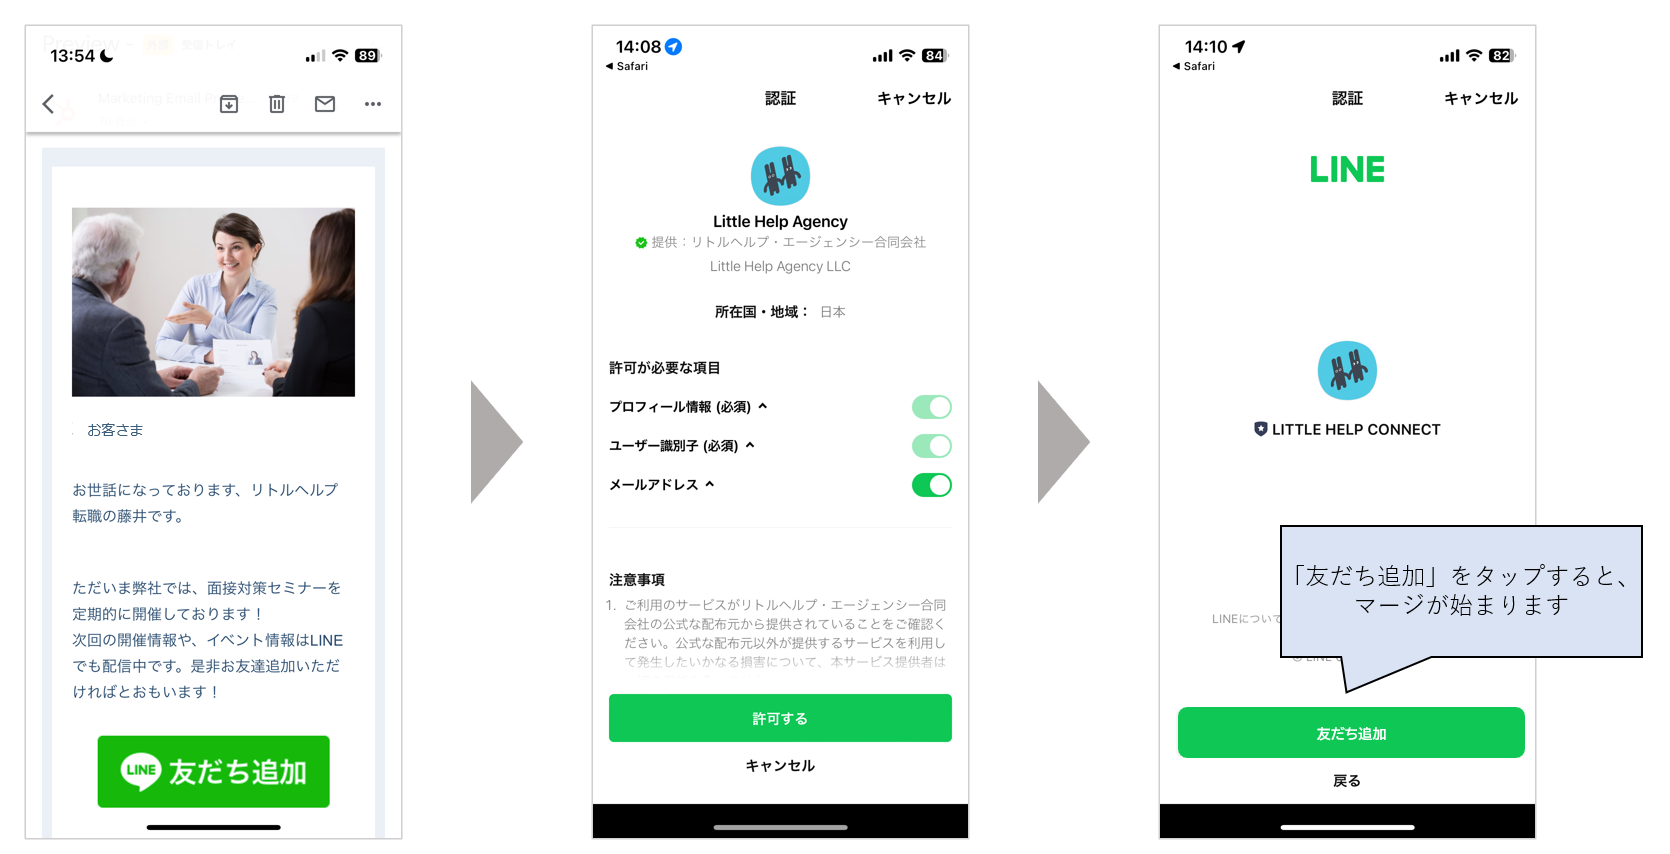
If the contact is not yet a friend, tap the third "Add Friend" button to start the merging process.
If the contact is already a friend, tapping the second "Allow" button will start the merging process.
When the contact proceeds to tap the button, the screen will eventually transition to the talk screen.
The merging process takes about 5 seconds from the start.
If you click "Add Friend" in the e-mail on your PC instead of on your smartphone, a QR code will be displayed in your browser, prompting you to use your smartphone.
A different QR code will be displayed for each contact.
Reference : Email address to be stored as primary
The email address that becomes primary through this operation is the email address used for marketing emails.
The old merged email addresses will not be overwritten, but will be kept as secondary.
Only if some email address was originally registered with LINE, the email address will remain as a secondary. If the original email address is "XXXX@line.me", the email address will not remain as a secondary and will be overwritten.
