Last Update: January 9, 2024
Overview
Using LITTLE HELP CONNECT, you can switch LINE's Rich Menus for each friend based on information managed in HubSpot.
For instance, you can set-up below.
- display Rich Menu A for non-members
- display Rich Menu B for existing members
This article explains the process of creating Rich Menus and the timing of their application.
If Rich Menus are configured in both LINE Official Account and LITTLE HELP CONNECT, the settings in LITTLE HELP CONNECT take precedence, and LINE's settings won't be visible to friends.
How to create
To begin, access LITTLE HELP CONNECT's "TOP > CONNECT > LINE Official Accounts > Select a LINE Official Account > Menu".
Press "Create Rich Menu" on the right side of the screen.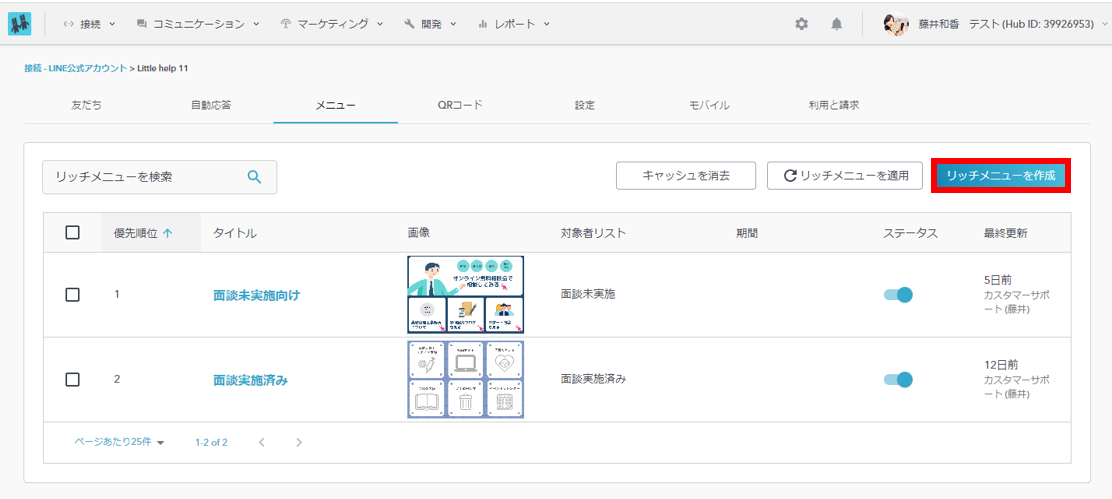
This section describes the items to be created.
Item Details
- Title
- Enter an administrative title for the Smart Rich Menu.
- Enter an administrative title for the Smart Rich Menu.
- Display settings
- Image
- Upload an image you would like to use as a Smart Rich Menu.
The image must be one of the following sizes and no larger than 1 MB.
- Width 2500px × Height 1686px
- Width 2500px × Height 843px
- Upload an image you would like to use as a Smart Rich Menu.
- Image
When registering an image size of "2500px (W) x 843px (H)", please be sure to set the layout as shown in the red frame below. Otherwise, the image will not be displayed properly on smartphones.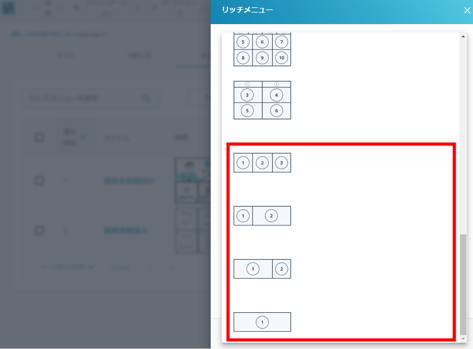
-
- Menu bar label
- Set the text to be displayed in the Smart Rich Menu bar.
- Set the text to be displayed in the Smart Rich Menu bar.
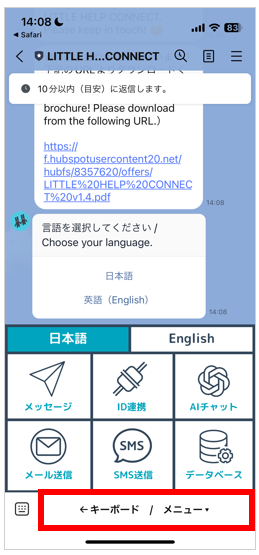
- Open the menu by default
- Set to "ON" if you want the Smart Rich Menu to appear by default when you open the talk screen. If you want the keyboard input to appear by default, please set it to "OFF".
- Set to "ON" if you want the Smart Rich Menu to appear by default when you open the talk screen. If you want the keyboard input to appear by default, please set it to "OFF".
- Menu bar label
- Display targets
- Priority
- If multiple Smart Rich Menus are registered, this setting allows you to adjust which Smart Rich Menu is prioritized to be displayed to the contact.
If only one Smart Rich Menu is registered, set "1".
If the same contact is registered in multiple lists, the menu with the highest priority (lowest number) will be applied.
- If multiple Smart Rich Menus are registered, this setting allows you to adjust which Smart Rich Menu is prioritized to be displayed to the contact.
- Do not use the list
- If you want all your friends to see the Smart Rich Menu while they are subscribing, please select "ON". If you want to show or hide the Smart Rich Menu according to your friends' conditions, please set it to "OFF".
When "ON" is selected, you will see an item that allows you to select your HubSpot contact list.
*It is assumed that you have created a contact list in HubSpot in advance.
- If you want all your friends to see the Smart Rich Menu while they are subscribing, please select "ON". If you want to show or hide the Smart Rich Menu according to your friends' conditions, please set it to "OFF".
- Specify the period
- If you wish to limit the time period for which the Smart Rich Menu is displayed, set it to "ON". When "ON" is selected, an item for setting the start and end dates will appear.
If you do not want to set a specific period of time for displaying the Smart Rich Menu, please set it to "OFF".
- If you wish to limit the time period for which the Smart Rich Menu is displayed, set it to "ON". When "ON" is selected, an item for setting the start and end dates will appear.
- Specify the day of the week
- If you wish to limit the days of the week when the Smart Rich Menu is displayed, set "ON". When "ON" is selected, an item for selecting the day of the week will appear.
If you do not wish to set a specific day of the week for displaying the Smart Rich Menu, please set it to "OFF".
- If you wish to limit the days of the week when the Smart Rich Menu is displayed, set "ON". When "ON" is selected, an item for selecting the day of the week will appear.
- Priority
- Menu content
- Layout
- Select which of the template layouts the Smart Rich Menu button placement corresponds to.
- Select which of the template layouts the Smart Rich Menu button placement corresponds to.
- Layout
-
- Action Type
- Set the action when a friend taps the button. Choose from "Text", "Link", "Switch Menu", or "Postback".
- Set the action when a friend taps the button. Choose from "Text", "Link", "Switch Menu", or "Postback".
- Action
- Set the details of the action.
- If the action type is "Text," specify the text to be sent upon tap.
- If the action type is "Link," specify the URL of the page to be displayed upon tap.
- If the action type is "Switch Menu," select the Smart Rich Menu to switch to.
- If the action type is "Postback," specify the postback data to be sent upon tap.
- Set the details of the action.
- Action Type
-
- Workflow
- If the action type is "Menu Switching", you can register a contact to a specific workflow. Select the workflow you wish to register.
There are two save buttons: "Save Draft" and "Apply Rich Menu. If you click "Save Draft", your settings will be saved, but the menu will not be applied to your LINE friends.
- If the action type is "Menu Switching", you can register a contact to a specific workflow. Select the workflow you wish to register.
- Workflow
Reflection timing of smart rich menu
The Smart Rich Menu will be reflected at the following times.
In order to use Smart Rich Menu, the status must be "Active". Smart Rich Menu cannot be displayed to your friends if it is not "activated".
- When to click the "Apply Rich Menu" button
- When the "Apply Rich Menu" button on the Smart Rich Menu Settings screen of LITTLE HELP CONNECT is clicked, the Smart Rich Menu will be displayed to the target contact immediately.
-png-2.png?width=617&height=813&name=%E3%83%AA%E3%83%88%E3%83%AB%E3%83%98%E3%83%AB%E3%83%97-%E6%9C%AC%E7%95%AA%E7%94%A8-LITTLE-HELP-CONNECT%20(1)-png-2.png)
If you do not click the "Apply Rich Menu" button, the Smart Rich Menu for the target contact will be displayed at night.
We perform batch processing to reflect the Smart Rich Menu during the night.
- When the "Apply Rich Menu" button on the Smart Rich Menu Settings screen of LITTLE HELP CONNECT is clicked, the Smart Rich Menu will be displayed to the target contact immediately.
- Timing of chatflows operation
- By using the chat flow action "Refresh Rich Menu", you can immediately display a smart rich menu to the target contact.
Contacts whose rich menu has been updated in the chat flow are also subject to the late-night batch processing. If you want to display the same rich menu to the contact after the batch processing, please be sure to include the contact in the list of contacts to whom the rich menu will be displayed.
- By using the chat flow action "Refresh Rich Menu", you can immediately display a smart rich menu to the target contact.
- Timing of workflow operation
- By setting up a workflow, you can immediately display the Smart Rich Menu to the target contact. For details on how to set this up, please refer to "Refresh Rich Menu" Action.
Due to the specification, it is not possible to immediately change the rich menu of friends triggered by list registration. If you want to change it immediately, you need to set up a workflow.
- By setting up a workflow, you can immediately display the Smart Rich Menu to the target contact. For details on how to set this up, please refer to "Refresh Rich Menu" Action.
- Other timing
- The rich menu is immediately applied when adding or unblocking a friend.
- Due to our batch processing, the rich menu will be updated once a night.