This article describes how to create a chatbot.
1. Creating a Chatflow
Log in to the LITTLE HELP CONNECT administration page and select "Chatflow" from the "Conversations" menu.
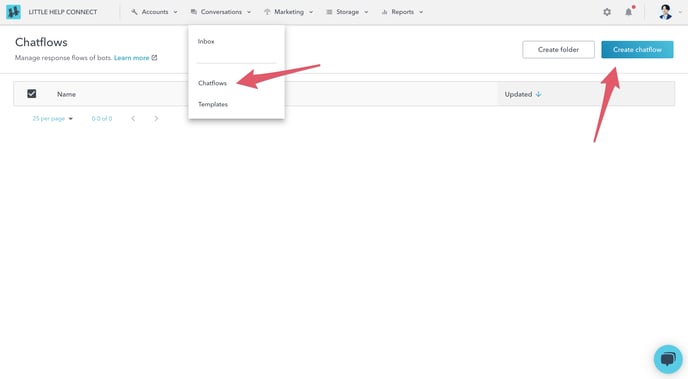
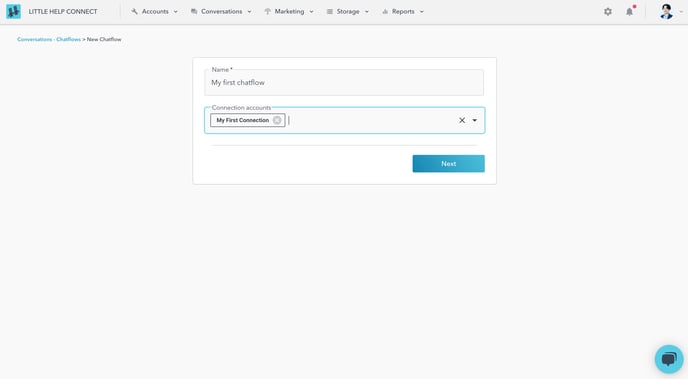
Create a new chatflow by clicking the "Create chatflow" button in the upper right corner. Specify the account created in Step.1 for the "Connection accounts.
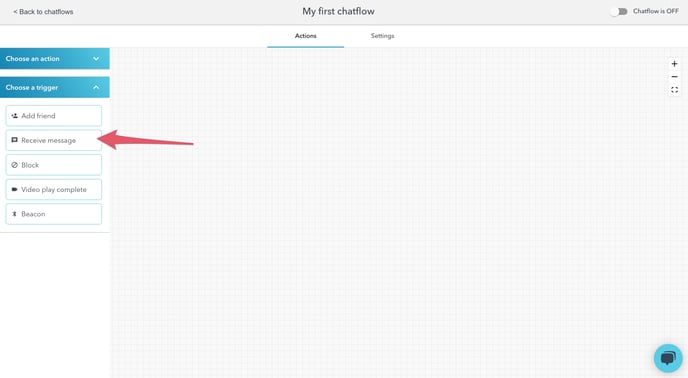
2. Trigger settings
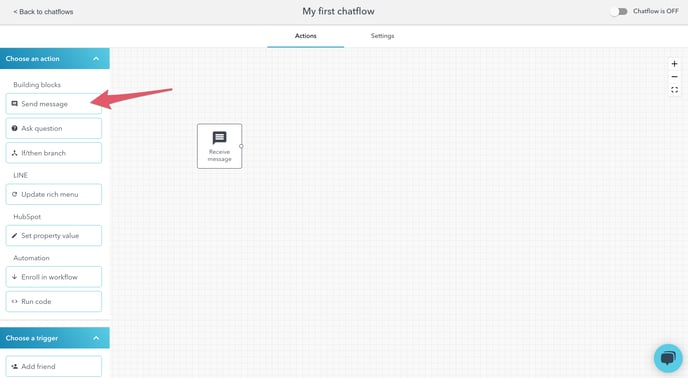
Drag and drop the "Receive message" trigger from the "Choose a trigger" menu on the left side of the page onto the center canvas.
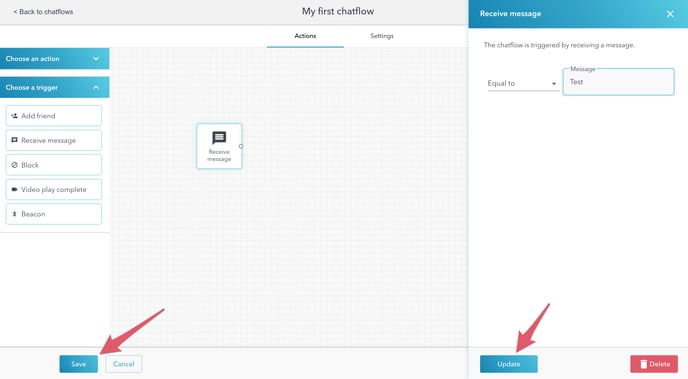
Set the trigger to "Equal to Message: Test" and save.
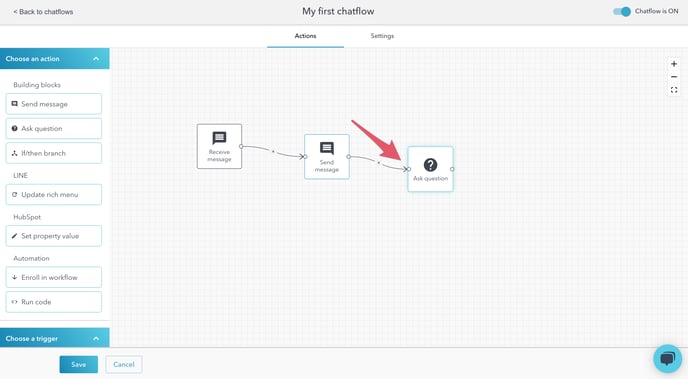
3. Action settings
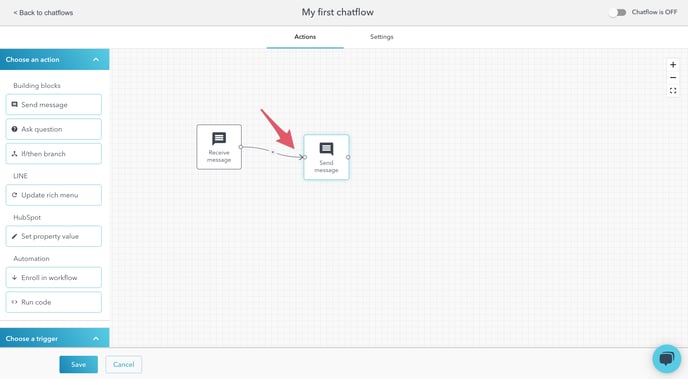
Drag and drop the "Send message" trigger from the "Choose an action" menu on the left side of the page onto the center canvas.
Connect the "Receive message" trigger with the "Send message" action.
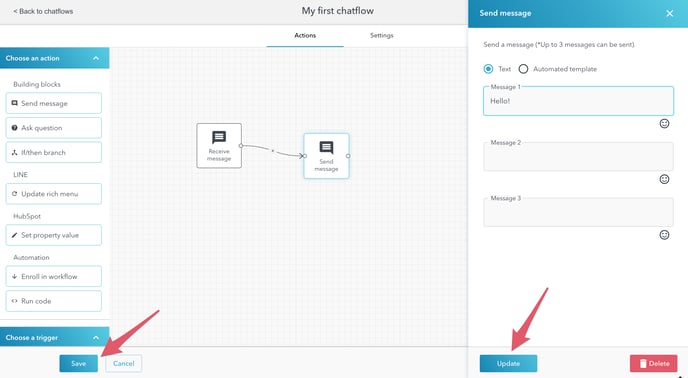
In the action, set "Message 1: Hello!" and save it.
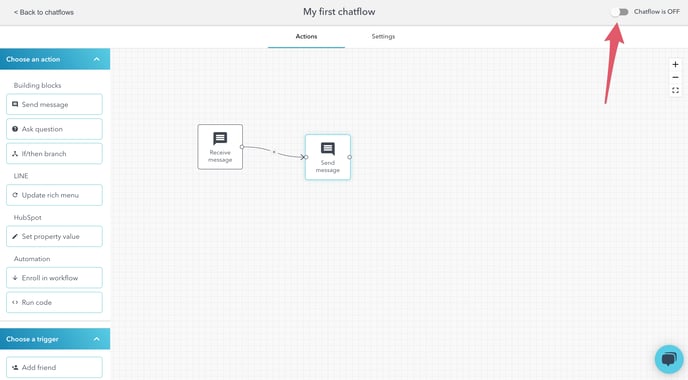
Finally, activate the chatflow by pressing the toggle button in the upper right corner.
Send a message to the LINE Official Account saying "Test" and if it replies "Hello!" the setup is successful.

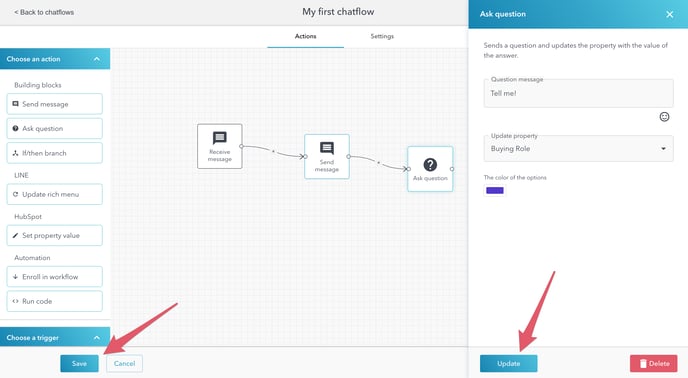
4. Question action settings
Add an "Ask question" action from the "Choose an action" menu and connect it after the "Send message" action.
In the action "Question message: Tell me! " set "Buying Role" as the Update property and save it. You can change the button's color to your preferred color by specifying the color of your choice.
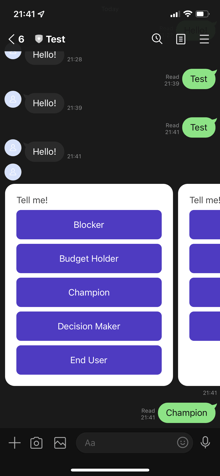
Send a message "Test" to the official LINE account. Tap any button from the choices returned in the response.
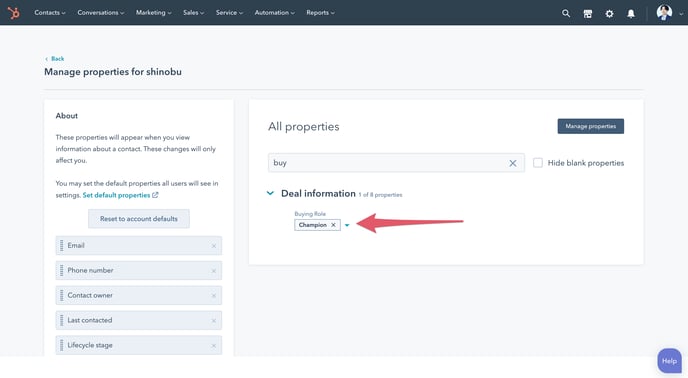
Open the HubSpot LINE contact and if the property "Buying Roles" is set to the value you selected, you have succeeded.
Step.3 Segment Messaging